
How to use a Chromebook: 10 must-know tips, tricks, and tools for beginners
 Image: Lenovo
When Google first introduced Chromebooks in 2011, it seemed like a ridiculous idea. A laptop that can only run a browser? Who wants that? But over time, web apps slowly became more powerful and capable, while Google steadily improved the Chrome OS experience. Then, Google went even further and added the ability to run Android apps, and still further with Linux desktop apps.
All of this means the Chromebooks of 2019 and 2020 are nothing like that original experience. Today, Chrome OS feels like a modern operating system that offers a first-class web browser, the flexibility of mobile apps, and a desktop experience in one box. It can satisfy the needs of almost every user, with the notable exception of those who need video or advanced image editing.
If you set your Chromebook up right, that is. Let’s get that done.
1. Get to know ChromeOS
 IDG
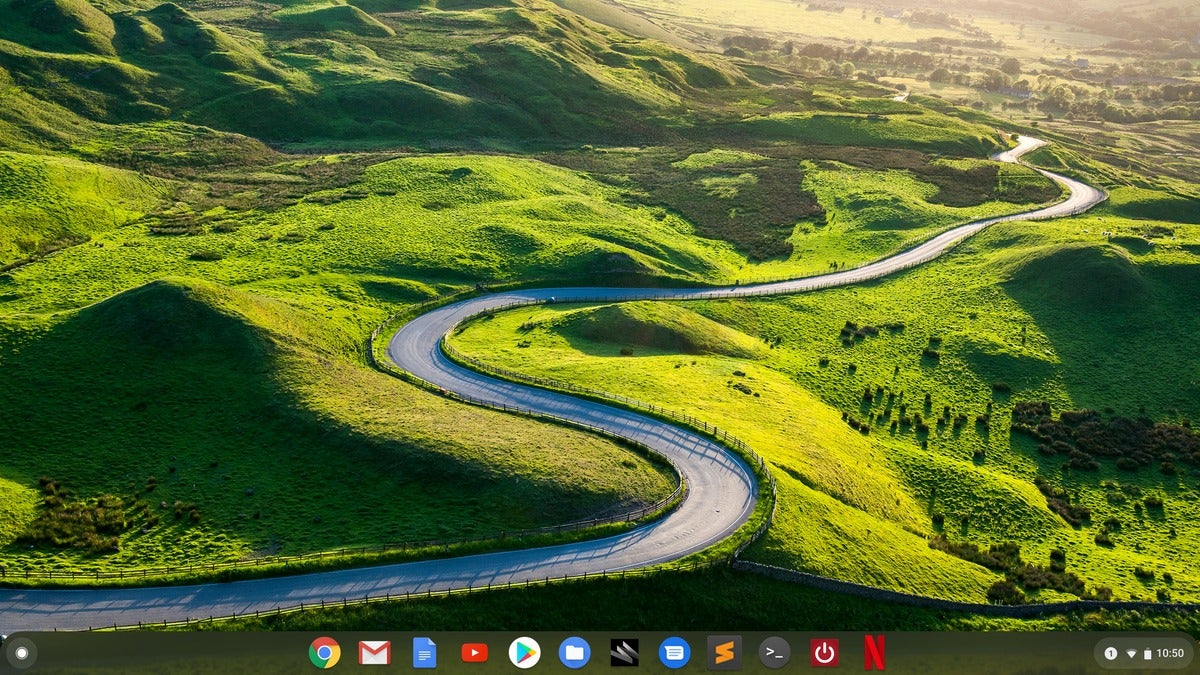
IDGA Chromebook desktop with Chrome OS 76.
Chrome OS has some basic similarities with other desktop systems. Just like Windows, Linux, and OS X, there’s a desktop area that you can customize with your own background image. But unlike the desktop in other systems, you cannot place any files here. It’s merely a visual space where you can arrange open windows.
When you open an app it will open in a new window if it’s an Android app, desktop app, or web app that you’ve set-up to launch in its own window. Otherwise, you’re opening a tab in the main browser. Open windows can be resized or split to take up half the display like in other systems, though some Linux desktop apps may not respond to these commands.
You’ll probably notice right away that your keyboard has a search icon where the caps lock key should be. This search key is a way to search your devices, apps, and the web in one spot. It’s also a way to see every app on your system.
To begin, tap the key, and a Google Assistant box pops up at the bottom of the screen with some of your recently used apps. Click the upward-facing arrow above the search box to get a view of everything you have available.
Most apps will appear here just as they would on an Android phone, but Linux apps are grouped together.
 IDG
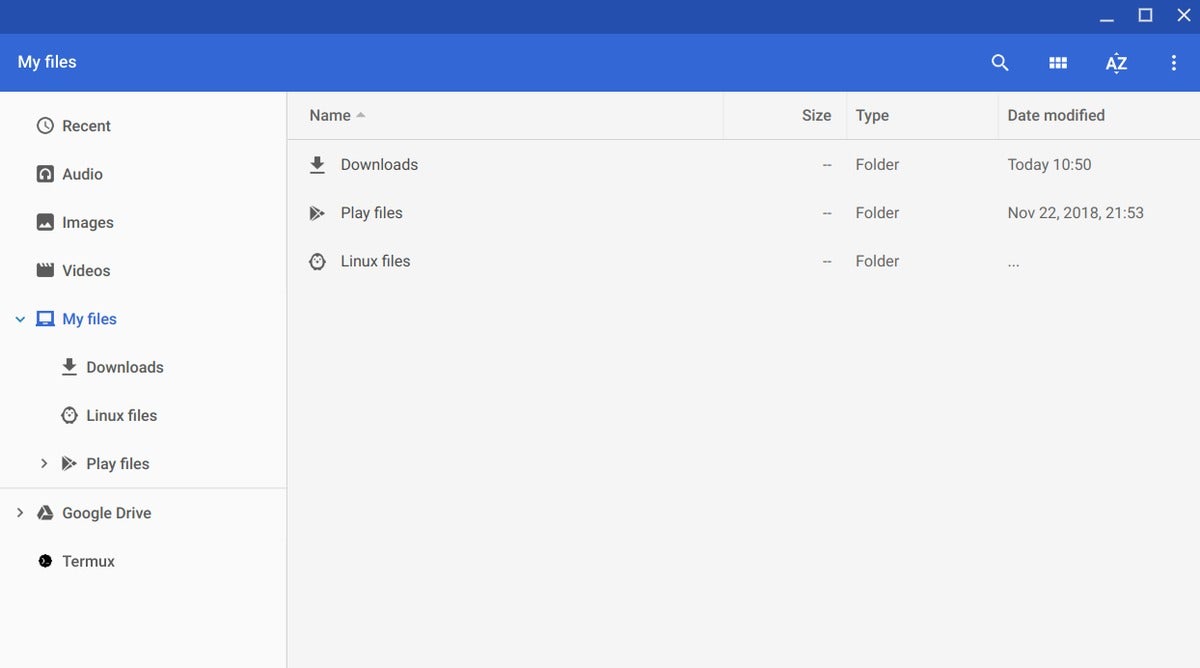
IDGThe Chrome OS Files app in version 76.
One system-critical Chromebook app is Files. This is the Chrome OS file manager that lets you access files saved on your system, view the contents of a ZIP folder, or access items in Google Drive.
The last point of interest in our system tour is the lower-right corner of the taskbar-like Shelf, called the system tray. (More on the Shelf later.) The first thing you’ll see is a small counter that tells you how many notifications you have. Click it, and you can view and clear your notifications.
 IDG
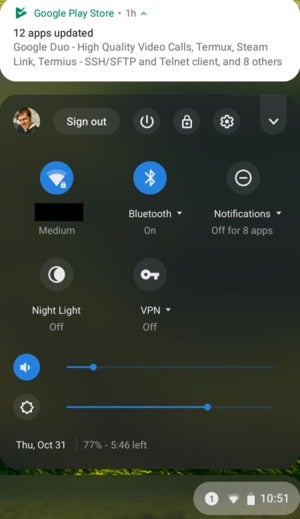
IDGThe system tray in Chrome OS 76.
Next to that are a clock, Wi-Fi status, and a battery life indicator. Click this area, and a panel appears with basic system settings, including Wi-Fi, VPN, Bluetooth, Night Light, volume, screen brightness, a shutdown button, and more
Selecting the cog icon in this section opens your Chromebook’s settings window. Here you can access system settings for the touchpad, mouse, keyboard, display, and onboard storage.
Finally, to access your Chromebook’s task manager, click Search + Esc. This shortcut used to be Shift + Esc, but Google is phasing it out.
2. Set up your shelf
When you first open your Chromebook, you’ll see several app icons sitting at the bottom of the screen. This area is called the Shelf, and it mimics the Windows taskbar. The Chrome OS Shelf shows which apps are running and provides an easy way to launch apps.
To make the Chromebook your own you’ll want to add your commonly used apps to the Shelf, and remove the ones you don’t use. To get rid of something, hover your mouse pointer over the app icon in question, tap the touchpad with two fingers (the equivalent of a right-click), and select Unpin from the context menu that appears.
 IDG
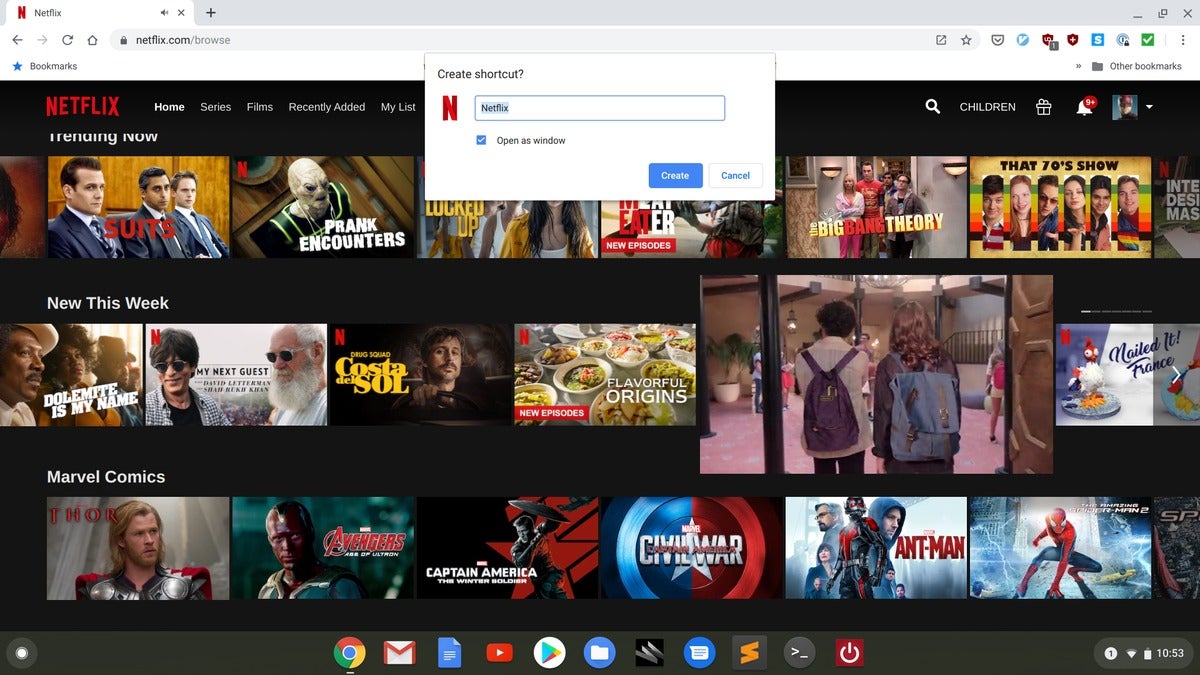
IDGAdding a website to the shelf in Chrome OS.
The easiest way to add web apps is to open the site you want in the browser. Next, right-click the webpage tab—it looks like three vertical dots—and select More tools > Create shortcut…. A small pop-up window appears asking you to confirm that you want to add the web app. If you want a desktop-like experience for the web app, check the box that says Open as window, and then click Create.
To rearrange apps on the shelf, click and drag them to the desired position.
3. Smartphone unlock
To open a Chromebook, you need to sign in with your Google account password. That’s easy enough, but if you have an Android phone this process can become even easier. Your phone can automatically unlock your computer without a password via Bluetooth.
To set this up, click the clock in the lower right corner of your desktop and select Settings. Next, in the left rail select Connected devices, then in the main window click Set up in the Android phone section.
A new window will pop-up displaying your phone by brand or nickname. If you recently switched phones it may take a few days for your Chromebook to recognize the new phone. If everything is set click Accept & continue, then enter your password and click Done. Finally, back in the Settings window, confirm that the slider next to your phone is enabled. If not, activate the slider and enter your password to confirm.
Now when your phone is near your Chromebook it should automatically unlock.
4. Modify Google Sync
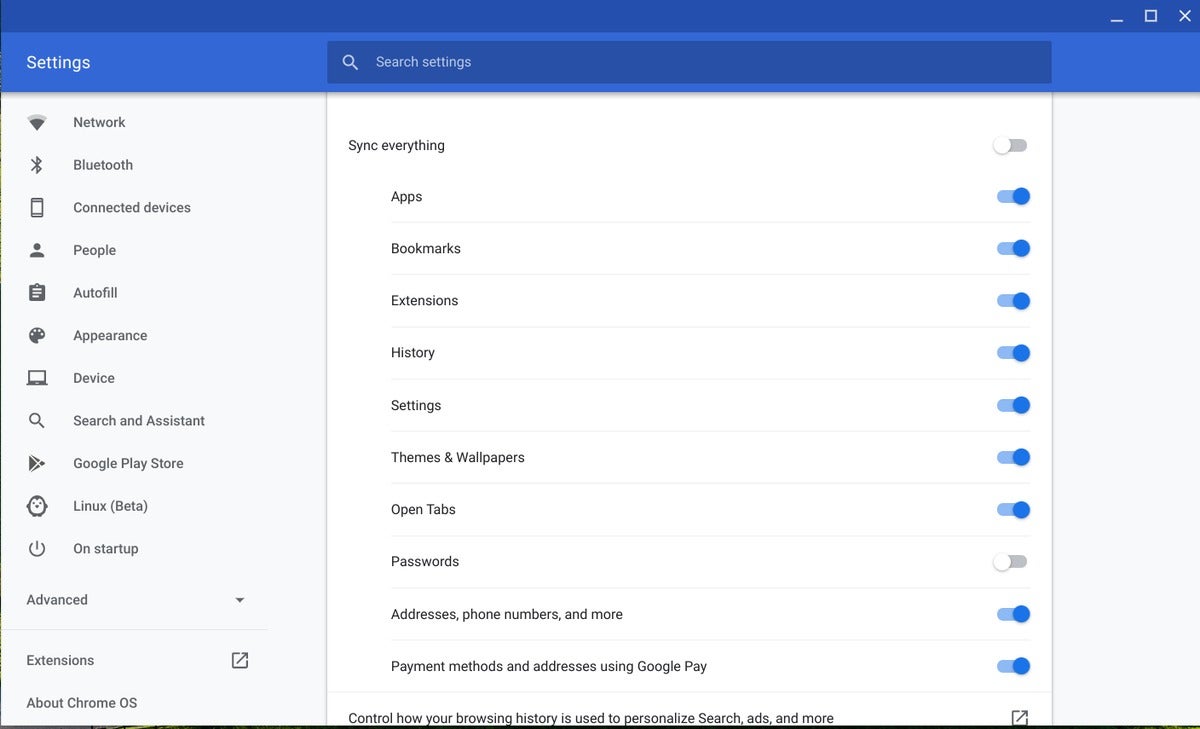 IDG
IDGDecide what you want to sync with Google’s servers and turn on encryption.
One of Chrome’s key features is the ability to sync your recently opened tabs, browsing history, bookmarks, extensions, passwords, and other items across multiple devices. This syncing works on any device that runs Chrome—including computers, smartphones, and tablets—as long as you’re signed into your Google account.
Syncing’s on by default with Chromebooks, but you can control which items are synced and which aren’t. Go to Settings, and then in the left-hand rail select People > Sync.
The next screen shows all the various items that are synced. Turn off Sync everything at the top, and then deactivate anything you don’t want shared with other devices.
Next page: Helpful controls, customizing your system, and more.
5. Know your keyboard and touchpad
We’ve already discussed the search key, but there are several other keys that you should get to know as well. If you look at the top of the Chromebook keyboard where the function keys would be on a Windows PC, you’ll see shortcut keys for actions such as adjusting the volume, refreshing the browser tab, and switching between windows. They’re superhandy. Check out Google’s help pages to learn what all of these keys do.
If you’d rather have these keys behave as standard function keys go to Settings > Device > Keyboard, and turn on Treat top-row keys as function keys. If you don’t want a permanent switch, you can force these keys to become function keys on the fly by pressing Shift and your desired function key at the same time.
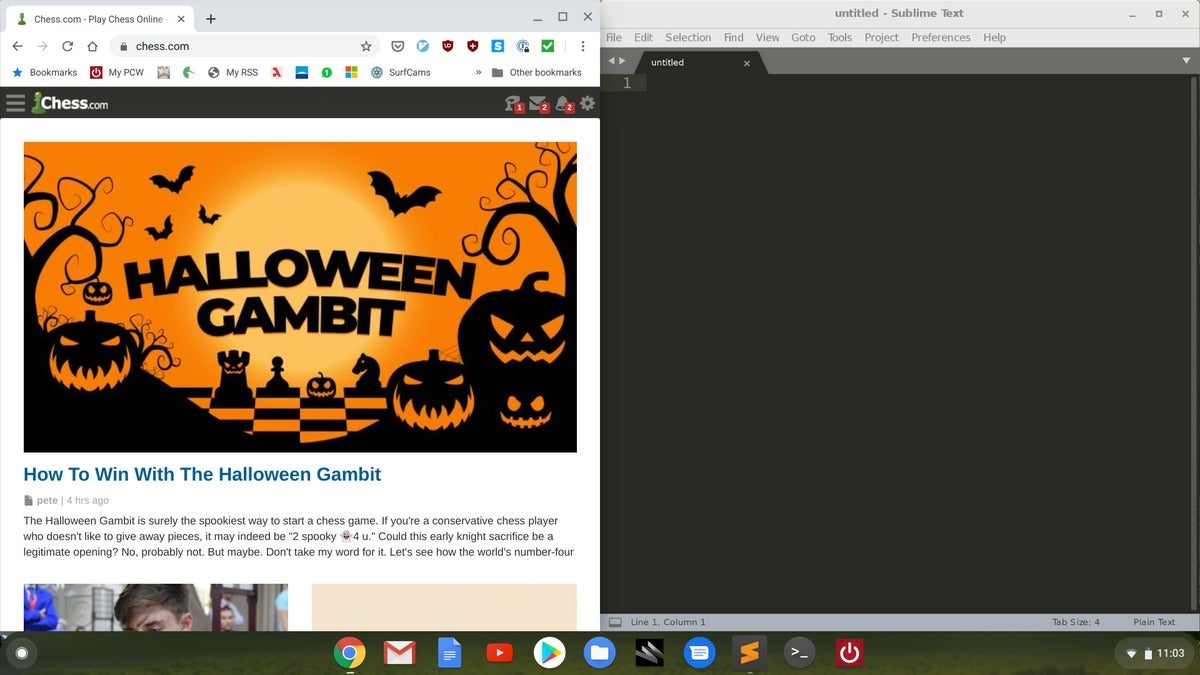 IDG
IDGChrome OS in snap mode.
There are also some basic touchpad gesture controls and keyboard shortcuts that all Chrome OS users should know. The first is the system’s “snap” feature, which fits an open window to half the size of the display. To do it, select the window you want to snap, then press Alt + ] to move the window to the right, or Alt +[ to the left.
Another important keyboard shortcut is Alt + Tab. Just like on other systems, this allows you to switch quickly among open windows.
Next is the touchpad. We’ve already discussed that a two-finger tap reveals the context menu. You can also navigate forward and backward through the history of a browser tab by swiping two fingers to the left or right. To scroll a page, move two fingers either upward or downward, as with other systems.
To switch between tabs, swipe left or right with three fingers. You can also tap the touchpad with three fingers to open a link in a new tab. Finally, to view all open windows on your desktop, swipe down with three fingers.
6. Personalize your desktop background
This is an easy one, but it makes your desktop your own. First, download the image you’d like to use, or copy it to your Chromebook via USB. Once that’s done, tap an open spot on the desktop with two fingers to reveal the context menu. Next, select Set wallpaper, and a window will open where you can select some stock images that come with your Chromebook.
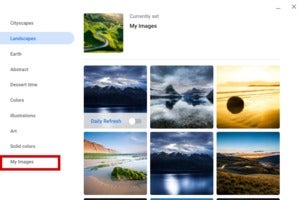 IDG
IDGChoosing a new wallpaper in Chrome OS 76.
At the bottom of the left hand rail, click My images, and then choose from the available images. In a few seconds, your new wallpaper will appear. If it doesn’t look quite right, choose between Center and Center Cropped in the upper right area of the pop-up window to adjust it.
You can also add a browser theme to change the color scheme of Chrome on your laptop. To do this go to Settings > Appearance > Browser themes, and click the link icon (that square with an arrow) that will take you to the themes section in the Chrome Web Store.
7. Customize the Search Key
Personally, I like the search key as-is, but if you’d rather have Caps Lock functionality or set the key to serve as a backspace, here’s how to do it.
Open settings again, choose Device in the left-hand rail, and then select Keyboard. On the next screen, you’ll see a drop-down menu next to Search. Click that menu, select the functionality you’d like the Search key to have, click OK, and you’re all set.
You can also adjust the functionality of Ctrl, Alt, Escape, and Backspace.
8. Enable offline functionality
Although society’s close to being oversaturated with Wi-Fi, there are still times when an Internet connection simply isn’t available. That’s when you need apps that can work offline. While Google’s web apps are built to work from the web, they still include some offline functionality to keep you going when your Internet calls it quits. Be aware that enabling offline use requires apps to download data directly to your local storage, and most Chromebooks pack precious little space, so you may need to shuffle some things around.
Third-party apps in the Chrome Web Store that work offline will advertise the feature. Native Chromebook apps like Docs, Calendar, and Gmail need a little tweaking, and the way to enable offline mode varies from app to app.
To enable offline productivity in Google Drive you need to specify the files you want offline. Open Google Drive in your Chromebook, select the three dot icon, and from the drop down menu activate Available offline.
Google Calendar doesn’t have an offline option, but you can download the Google Calendar Android app for that.
Finally, open Gmail on your Chromebook, and select the settings cog icon in the upper right corner. Select the Offline tab, and check the box labeled Enable offline mail.
A Google Keep app is built-in to your Chromebook and works offline automatically, but if you’ve never used it on your Chromebook you’ll need to open it to allow your notes to download.
9. Use Android Apps
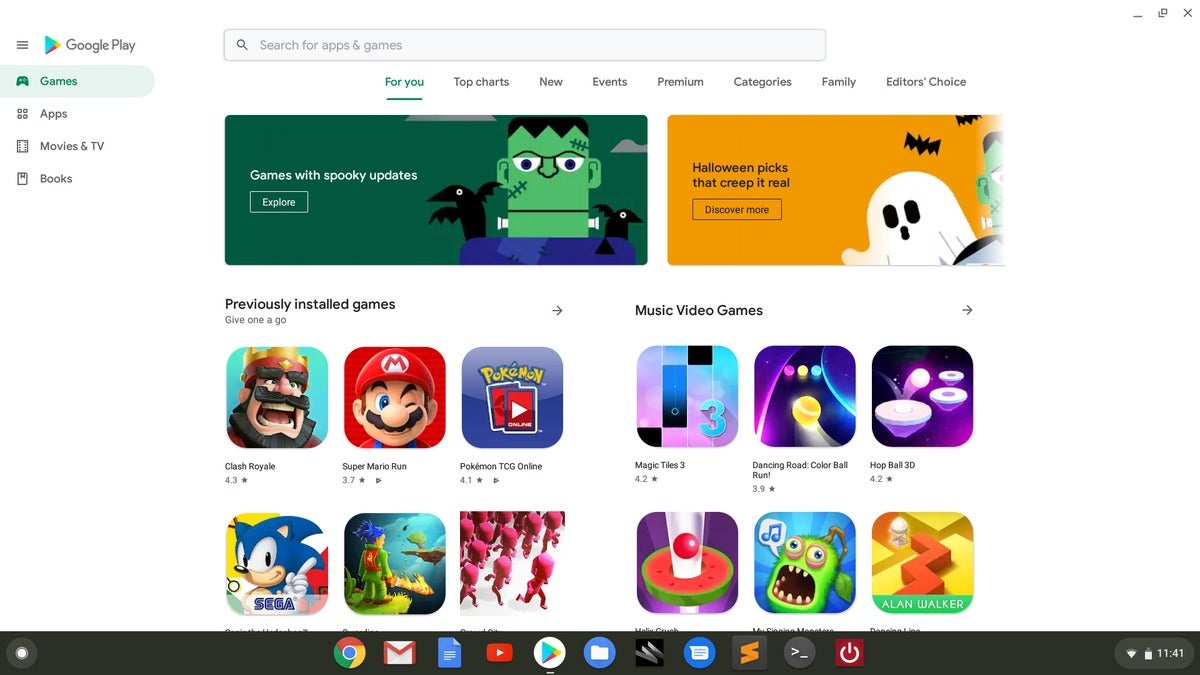 IDG
IDGGoogle Play in Chrome OS 76.
All Chromebooks now come with the capability to run Android apps from the Google Play Store, and many older Chromebooks do, too. Adding Android apps to your Chromebook is as easy as adding an app to your smartphone or tablet. All you do is open the Play Store, choose the app you want, click Install, and you’re done.
You may run across the odd Android app that won’t run on your Chromebook, but most apps will run just fine, You can, for example, run Valve’s Steam Link to stream games from your desktop to PC to a Chromebook.
10. Use Linux Apps
Chromebooks also come with the ability to run Linux desktop apps. How this works for older devices depends on the processor, but all of the latest Chromebooks are supposed to come with the capability. With Linux app compatibility you can run many of your favorite apps, or find alternatives such as Libre Office in place of Microsoft Word—though you can run the Android versions of Office if you prefer.
To activate Linux, click on Linux (Beta) in the lefthand rail of the Settings app. On the next screen, click the Turn on button at the top, then follow the instructions. Installation takes a few minutes, but once it’s done you’ll be able to run Linux apps.
This feature isn’t entirely user-friendly, as it’s meant for developers. The best way to install Linux apps on your Chromebook is through the command line and the Advanced Package Tool (APT). You can also download and install DEB files directly, but APT is the easier way to go because it can automatically handle dependencies (utilities your target application requires).
Here’s a solid tutorial on how to use APT.
BONUS: Get to know the Extras
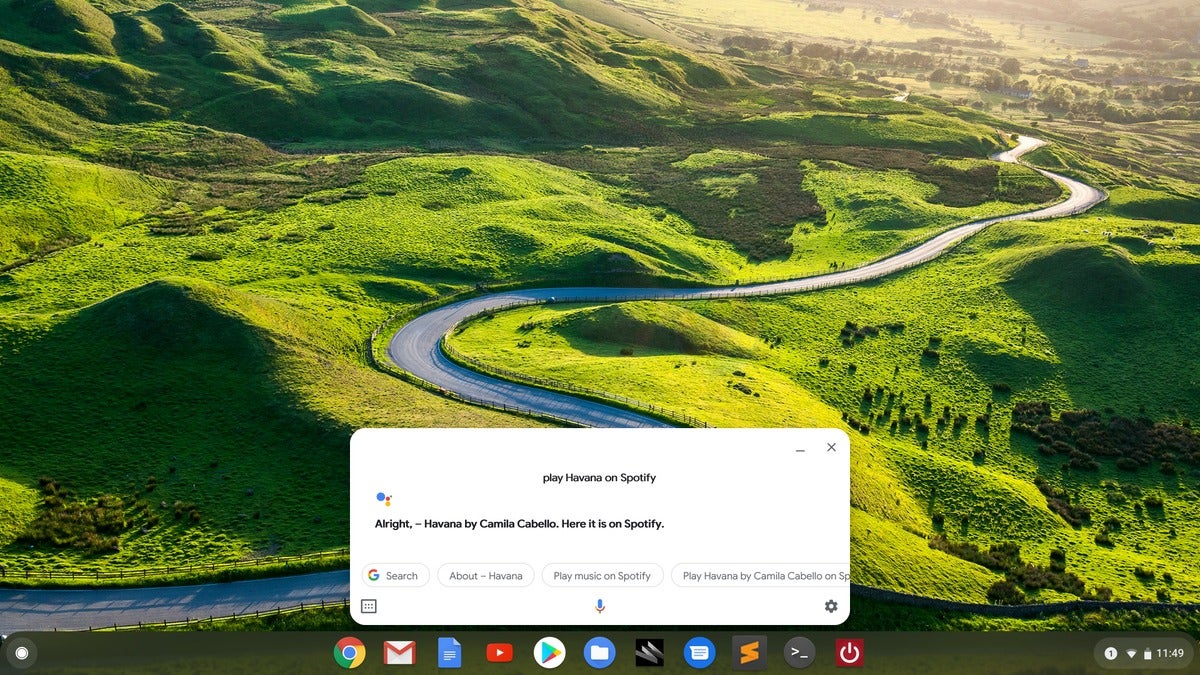 IDG
IDGThe Google Assistant running on Chrome OS 76.
Beyond the basic functionality there are a bunch of nice extra features that some users might enjoy. First, there’s the Night Light, which can be set to turn on and off with sunset and sunrise. To activate this feature go to Settings > Displays > Night Light. Here you can turn it on, as well as schedule it to run sunset to sunrise or with a custom time setting.
Google Assistant is also available on Chromebooks, for those times you want to do a quick web search or get the weather. The catch is that Assistant on Chromebooks doesn’t use the “OK Google” command as it does on phones. To save battery power, “OK Google” works only when your Chromebook is plugged in. You could set it to Always on, just be warned it may drain your battery faster than you’d like.
When “OK Google” isn’t working, you can tap the microphone icon in Google Assistant from the launcher. To get started with Assistant go to Settings > Search and Assistant > Google Assistant.
Finally, if you like the idea of a Chromebook, but you don’t want to be searching on Google by default, you can change that. Go to Settings > Search and Assistant > Search engine used in the address bar to select options such as Yahoo, Bing, and DuckDuckGo.
Wrapping up
Those are the ten things (plus one) we advise new Chromebook owners to take care of to get the best experience on their laptop. If you ever run into a problem or need to know how to do something, open the built-in Get Help app. This is a basic guide that can give you tips on using your Chromebook.
Finally, if you’re looking for online tools to use on your Chromebook, be sure to check out PCWorld’s guide to 12 powerful websites that can replace your PC software. The web’s mighty potent these days.